Источник:
https://stoneridgesoftware.com/advan...ntal-invoices/
==============
There are several ways to create invoices. You can create a single invoice from an agreement, or you can generate a batch of invoices by agreement type and/or customer.
How Dates and status affect Rental Lines
- The Rental from and Rental To date determine the amount of time for the Renting invoice line
- The Invoicing start Date is usually the day that you want the Invoice to go out on
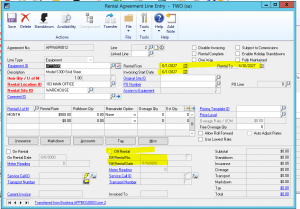
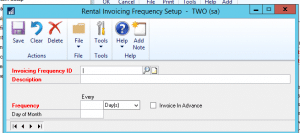 Taking equipment off rent
When equipment is ready to be taken off rent, you can record the off-rental dates using the On Rental Entry window. For agreements that have more than one piece of equipment, you can record different off rental dates for each agreement line.
- Choose Transactions > Equipment > Rental Agreement Entry.
- Choose an agreement.
- Choose the On Rental button.
- If you have multiple agreement lines, choose the line on the bottom of the window.
- Mark the Off-Rental checkbox.
- Enter a Date. Today’s date fills automatically.
- The Off-Rental Number is generated automatically.
- Choose Process.
- If all the above are in place the Equipment can be invoiced
Creating an individual invoice from the agreement
Invoicing a rental agreement involves the following:
Step 1: Create the invoice.
Step 2: Print and review the invoice.
Step 3. Post the invoice.
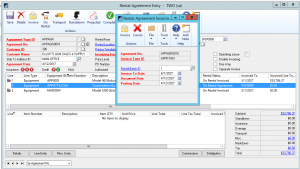
- From the Rental Agreement Entry window, choose the Invoice button to open the Rental Agreement Invoicing window. Most of the fields on this window fill in automatically.
- If you want to include this invoice in a batch, enter a Rental Batch ID.
- Change the remaining fields, if necessary.
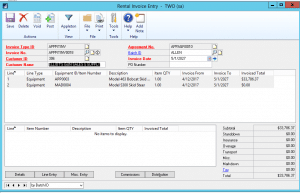
- Choose Invoice to open the Rental Invoice Entry window.
Note: The system will not create an invoice with a $0 amount, nor will it create one if the equipment is not “on rent.” If you receive an error message instead of the Rental Invoice Entry window, check the invoice rate and equipment status.
Most of the fields are filled automatically from the previous windows. You can change the information or amounts, if necessary.
- Choose Details to view information about the details of this agreement. This information fills from the Rental Agreement Details Entry window.
- Choose Misc. Entry to add miscellaneous items currently. The Rental Invoice Miscellaneous Entry window is like the Rental Agreement Miscellaneous Entry window.
- The Commissions and Distribution fill from the corresponding windows on the Rental Agreement Entry window. You can choose these buttons to view and change information.
- If you are using Multi-Dimensional Analysis (MDA) for certain accounts, you can choose an account and choose the A button. This opens the Rental Invoice Transaction Profitability Entry window, where you can change MDA information.
- To change rental rates or enter credit lines, double-click the agreement line on the Rental Invoice Entry window; this opens the Rental Invoice Line Entry window.
- Change rental rates or enter credit lines, if necessary.
- Choose Save to save the Rental Invoice Line Entry window. Close this window to return to the Rental Invoice Entry window.
Step 4: Print and review the invoice
You can print an invoice for an agreement directly to a printer, but not to a file. You can print individual invoices or several invoices included in a batch.
- Choose Transactions > Equipment > Invoice Entry.
- Choose an invoice number for the invoice you want to print.
- Choose the down arrow next to the printer icon, then choose the appropriate menu option to open the Print window.
- Choose the printing options and then choose OK. The invoice prints to the selected printer.
Step 5: Post the invoice.
- From the Rental Invoice Entry window, choose an invoice.
- Choose Post. -You can view posted invoices using Sales Order Processing (SOP), or using Receivables Management (RM) if you posted through RM.
Printing an edit list for a rental invoice
You can print an edit list for rental invoice and rental invoice batch entries. Printing an edit list allows you to view the details of the invoice and check for errors before posting. You can print the edit list from the Rental Invoice Entry window and Rental Invoice Batch Entry window.
To print from the Rental Invoice Entry window:
Printing an edit list from the Rental Invoice Entry window will display the details of a single invoice.
- Choose Transactions > Equipment > Rental Invoice Entry.
- Use the lookup field to choose the invoice entry you want to post.
- Choose the printer icon, then choose Edit List. You may be prompted to print the edit list to the screen, printer, or a file. Mark the appropriate check box and choose OK. The edit list will print to the selected destination.
 To print from the Rental Invoice Batch Entry window:
Printing an edit list from the Rental Invoice Batch Entry window will display the details for all invoices assigned to the selected batch.
- Choose Transactions > Equipment > Invoice Batches.
- Choose the batch from the Batch ID lookup field.
- Choose Print, then Edit List. You may be prompted to print the edit list to the screen, printer, or a file. Mark the appropriate checkbox and choose OK. The edit list will print to the selected destination.
Checking the edit list for errors
A rental invoice edit list shows the details, items, and account distribution and tax information of either a single invoice or each invoice in a batch. The edit list also summarizes the totals of the invoices without errors and the totals of the invoices with errors. If there are no errors in the invoice:
- The Audit Trail Code will be displayed in the invoice details.
- The Error Description column in the invoice details will display nothing.
- The totals listed under Invoices with Errors will amount to zero.
If the invoice contains errors:
- The Audit Trail Code will not be displayed in the invoice details.
The Error Description column in the invoice details will display the error message. The totals listed under Invoices with Errors will display a balance.
Creating a batch of invoices using the rental billing invoice routine
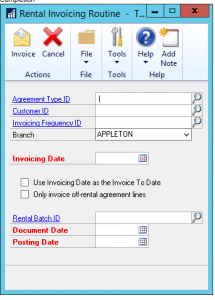
Use this routine to invoice agreements “outside” the Rental Agreement Entry window.
- Choose Microsoft Dynamics GP > Tools > Routines > Equipment > Rental Invoice Billing.
- Complete the following fields:
- Agreement Type ID- Choose an agreement type ID if you want to limit the agreements being invoiced to that type. Leave this blank to invoice all agreement types.
- Customer ID- Choose a customer ID if you want to limit the agreements being invoiced to that type. Leave this blank to invoice all customers.
- Invoicing Frequency ID- Choose the invoicing frequency ID.
- All Branches- Choose a specific branch or all branches.
- Invoicing Date- Enter the invoicing date. This date is compared to the next invoice date on the agreement and used to determine which agreements are invoiced.
- Use Invoicing Date as the Invoice to Date- Mark this checkbox to use the invoicing date as the next invoice date. If this box is not marked, the system will check to see if the invoicing frequency is set to invoice in advance; if so, it will calculate that date; if not, the Invoicing Date will be used anyway.
- Only invoice off-rental agreement lines- Mark this checkbox to invoice only agreements that are “off rent”.
- Rental Batch ID- Enter a Rental Batch ID if necessary.
- Document Date- Enter the document date.
- Posting Date- Enter the posting date.
3. Choose Invoice
Voiding or deleting a rental invoice
You can void or delete unprinted rental invoices and void printed rental invoices. Voiding an invoice automatically moves that invoice to history. Deleting an invoice can remove it permanently from the system, depending on rental setup.
Setting up the reason code for voiding/deleting
When a user voids or deletes a rental invoice, you can set up the system to not require a reason from the user, require a reason, or give the option of entering a reason.
- Choose Microsoft Dynamics GP > Tools > Setup > Equipment > Rental > Setup.
- From the Reason Code for Void/Delete drop-down, choose one of the following:
- Reason Disabled- When you void or delete an invoice, the system will not require you to give a reason.
- Reason Enabled- When you void or delete an invoice, the system gives you the option of giving a reason. The system opens a separate window, where you can enter the reason, or close the window without entering a reason.
- Reason Required- When you void or delete an invoice, the system opens a separate window, where you are required to enter a reason.
- If you want to be able to enter a reason code when deleting an invoice, you must also set the Action Taken Upon Invoice Deletion drop-down to Ask to move to history OR Move to History.
- Choose OK. – You can view the reason given from the Rental Invoice Inquiry window. Zoom on the Invoice Status line at the bottom of the window, and the reason you entered displays, as shown below:
Providing a reason at agreement/booking entry time
If the system is set to prompt the user to enter a reason (either required or not) when voiding or deleting an invoice, a window opens to give the opportunity for the user to enter the reason.
- Open a rental invoice and choose Void or Delete. When you delete or void an invoice, a validation window will appear display and then opens the Rental Reason Entry window.
- Enter a reason and choose OK.
The Rental Invoice Entry window clears.
Rental Invoice Inquiry
You can inquire on invoices that are either current or historical.
- Choose Inquiry > Equipment > Rental Invoice Inquiry.
- Choose an invoice. – The Invoice Status at the bottom of the window indicates whether the invoice is Current or Historical.
- To view additional information for this invoice, choose the appropriate button; these buttons and the window in general is a carbon copy of the Rental Invoice Entry window.
- Choose OK to close the Rental Invoice Inquiry window.
Invoicing a “rent to job” agreement
Even though you do not send an actual invoice to a customer for a “rent to job” agreement, you must still create and post an invoice. This creates a GL transaction, which can then be posted with job information to update costs in Job Cost.
Note: If you are using RM posting, you cannot post batches that have a mix of rent to customer and rent to job invoices. You must post the invoices separately from the Rental Invoice Entry window.
How invoicing works with “rent to job” agreements
You can create individual “rent to job” invoices or a batch of rent to job invoices. For individual and batch invoices, instead of a SOP invoice, a GL transaction is created. If multiple invoices are in a batch, each invoice receives its own journal entry, but only ONE batch is created.
If there is a mix of rent to customer and rent to job invoices in a batch, the system creates one SOP document for each rent to customer invoice, as it works currently. For rent to job invoices, one GL batch is created that contains all rent to job invoices.
Individual invoice entry
- On the Rental Agreement Entry window, choose Invoice.
- Fill the fields accordingly and choose Invoice to open the Rental Invoice Entry window. The Job Number, Job Description, and Cost Code fields fill from the agreement.
- Double-click the invoice line, and make changes, as necessary.
- Fill any remaining fields as necessary, including the Rental Invoice Line Entry or Rental Invoice Miscellaneous Entry windows. You can also print a Rental Invoice GL Posting Edit List prior to posting; choose the printer drop down in the upper right portion of the Rental Invoice Entry window and choose Edit List.
- On the Rental Invoice Entry window, verify the information, and choose Save, or Post to post the invoice.
- On the Rental Invoice Entry window, verify the information, and choose Post to post the invoice.
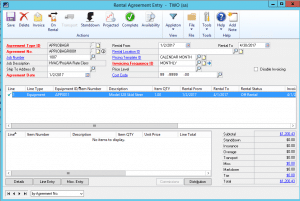
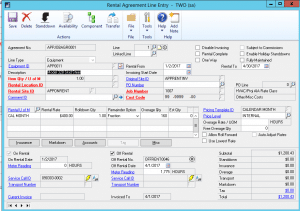
Note: Rental Invoice GL Posting Edit List
Batch invoice entry
- Choose Microsoft Dynamics GP > Tools > Routines > Equipment > Rental Invoice Billing.
- In the Agreement Type ID field, enter a rent to job agreement type.
- Fill the remaining fields as you normally would.
- When finished, choose Invoice.
What happens after invoices are posted?
After “rent to job” invoices are posted, the following occurs:
- The system creates a GL transaction, and either posts the transaction (if Post through GL setup option is marked) or just creates the transaction.
- When the GL transaction is posted, Job Cost is updated with the posted costs.
You can access the WS Transaction Entry window via the menu (Transactions > Financial > General) or by zooming on the Journal Entry field in the Rental Invoice Details Inquiry window. The Journal Entry number for GL appears on the Rental Invoice Details Inquiry window.
About “rent to job” account distributions
In addition to the rental rate, insurance, overage, and markdown account distributions, the system creates distributions for the following accounts for “rent to job” agreements:
- Cost Code- The account assigned to the cost code for the selected job.
- Rental Offset- The debit receivables account.
- Job Offset- The credit payables account.
The type of “Other” is used for “rent to job” transactions. You can also see account distributions for each invoice in the Rental Invoice Distribution Entry window. However, unlike rent to customer invoices, you CANNOT change distributions for a “rent to job” invoice.
Источник:
https://stoneridgesoftware.com/advan...ntal-invoices/


