Источник:
https://www.powerobjects.com/2018/04...s-integration/
==============
We know custom
actions provide an extension to available business logic. Certainly, we want to take advantage of this when we are bringing in new data.
SSIS is a powerful tool to connect data sources and it’s scripting component allows us to take advantage of Dynamics 365 functions.
In Visual Studio 2015 SQL Server Data Tools, creating and editing SSIS packages is simple. The Script Component creates an instance of VSTA, a stripped-down version of Visual Studio. It cannot reference assemblies that are not in the GAC.
Microsoft’s SDK provides all the assemblies we need to access Dynamics 365 resources. It is very important to have the version of the SDK that matches your version of Dynamics. After downloading and installing the SDK, it will create a Bin folder and that folder will contain the required assemblies.
There are four assemblies required for this script:
- Microsoft.Crm.Sdk.Proxy.dll
- Microsoft.IdentityModel.Clients.ActiveDirectory.dll
- Microsoft.Xrm.Sdk.dll
- Microsoft.Xrm.Tooling.Connector.dll
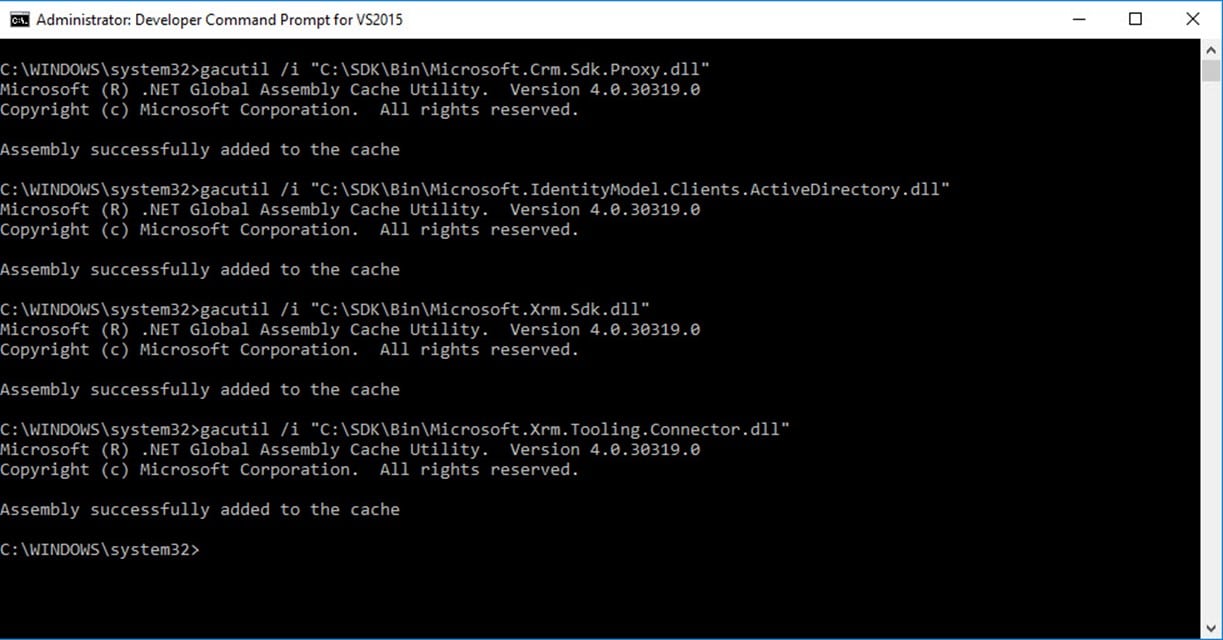
Using the
gacutil.exe tool, we will add these assemblies to the GAC so that they will be available to us during script execution.
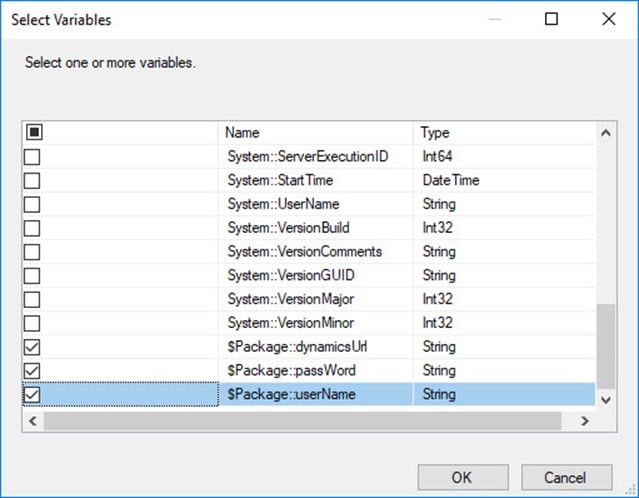
Now we can use these assemblies in our integration package. Launch Visual Studio and open our SSIS solution. We are going to create URL, username, and password parameters so that we can connect to our Dynamics instance. This provides security around sensitive information and the flexibility configure the package for multiple environments.

Create the script component and select the type of component we are creating.

We can use custom actions in any type of component. We will pass in the URL and authentication as
ReadOnly variables.

Select the
URL,
username, and
password.
Click
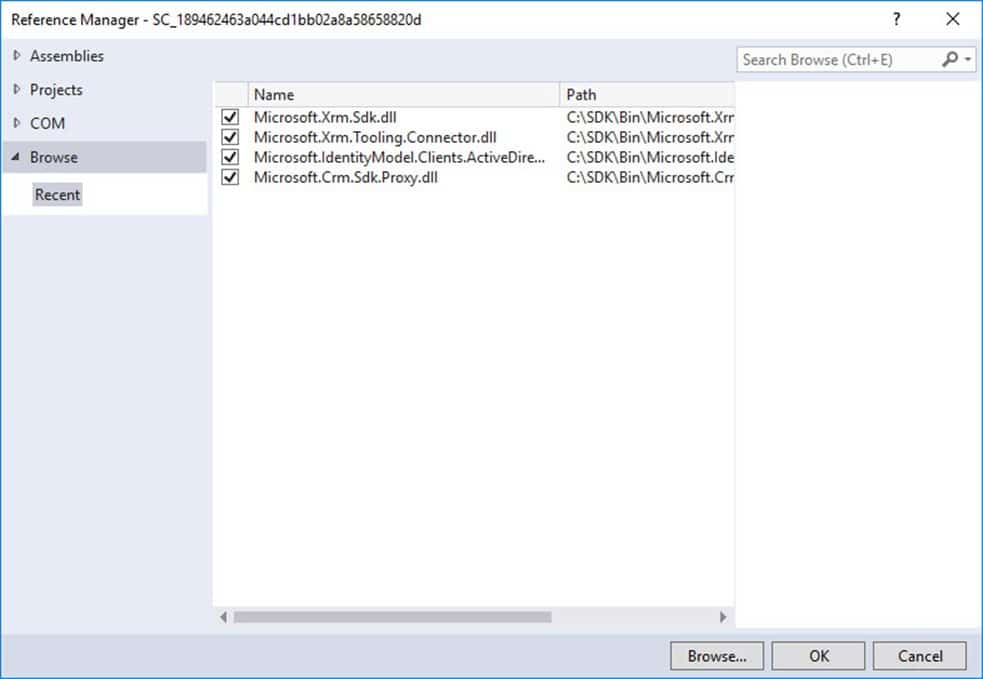
Edit Script to open the scripting instance of VSTA. We will need to add references to the assemblies to the script project.

Right click
References and select
add references. Click
Browse in the left pane.

Click the
Browse button at the bottom of the window and browse to the Bin folder in your SDK installation. Select the dlls that we already registered.

Click
Add to include these references in the available assemblies.
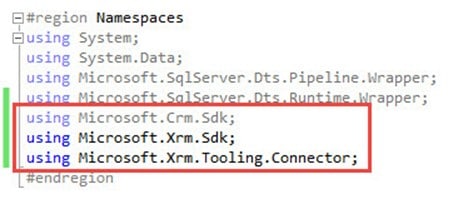
Finally, we are going to add the namespaces to our script and call our Dynamics custom action. At the beginning of the main.cs script expand the Namespaces region and insert the references for Microsoft.Crm.Sdk, Microsoft.Xrm.Sdk, and Microsoft.Xrm.Tooling.Connector.
The following script constructs a connection to Dynamics and requests for the custom action and then it executes the action and retrieves the response.

Using this technique, we can take advantage of advanced business logic during the import of additional data!
Be sure to
subscribe to our blog for more Dynamics 365 tips and tricks!
Happy Dynamics 365’ing!
Источник:
https://www.powerobjects.com/2018/04...s-integration/