 02.05.2020, 01:17
|
#1 |
|
Участник
|
stoneridgesoftware: Implementing a Credit Limit Approval Process with Workflows in Business Central: Part 2
Источник: https://stoneridgesoftware.com/imple...central-part-2
============== In the first installment of this series, we walked through how Dynamics 365 Business Central enables you to view and manage credit limit details within the customer card, while also providing the flexibility to enforce controls by leveraging the pre-configured Sales Order Credit Limit Approval Workflow. In Part 2 of this series, we will define and go over the Workflow Steps to get a better understanding of the Business Central logic that is taking place and how the workflow is structured. Creating a new Workflow using Workflow Templates As a review, search Workflows in the search bar and then navigate using the menu bar to New>New Workflow from Template. Then scroll to the Sales Documents section at the bottom and select Sales Order Credit Limit Approval Workflow.  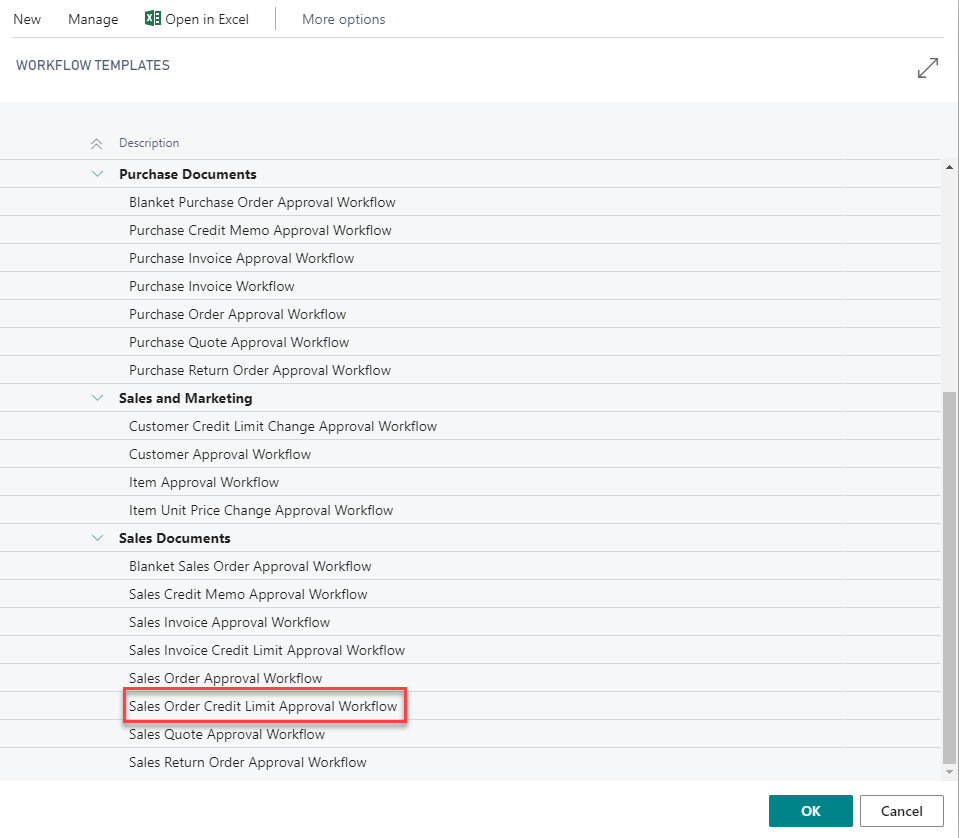 Understanding Workflow Steps  The workflow template creates pre-configured Workflow Steps for a standard approval process when a customer is over or under their credit limit. These Workflow Steps are made up of three sets of criteria: (1) When Event, (2) On Condition, (3) Then Response. (1) When Event: Specifies the workflow event that triggers the related workflow response. (2) On Condition: Specifies the conditions that control the workflow event that you specified in the Event Description field. This field is used to house any filters that are added within the order document. (3) Then Response: Specifies the workflow response that is triggered by the related workflow event. There can be one or several Responses associated with an event. In other words, The Workflow Event and Event Conditions will determine when each step of the workflow is triggered, and the Workflow Response will be action(s) that occur as a result of the conditional event. For a better understanding of the actual workflow logic taking place, I always recommend reading it as a sentence from left to right: WHEN an approval of a sales document is requested, ON THE CONDITION that the document is an open order, THEN check if the customer credit limit is exceeded.  The Workflow Steps use indentations to show the possible results from the Workflow Response. For this example, either the credit limit is exceeded or not exceeded. If there are no indented events under a corresponding event, that marks the completion of the workflow if you have reached that event. 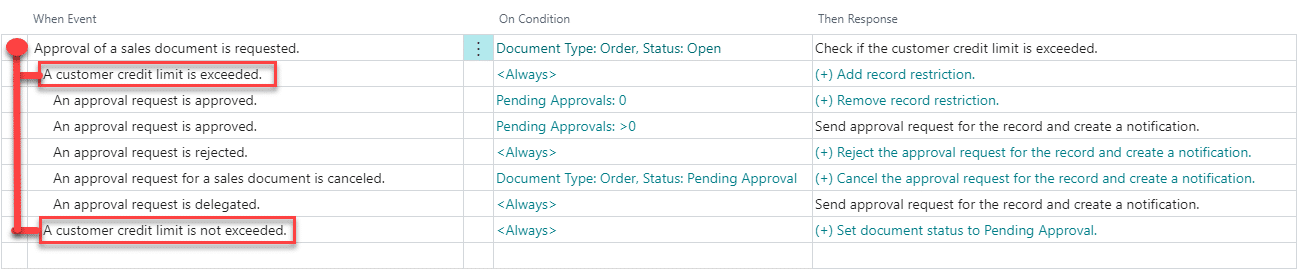 For some of the Workflow Responses, you will see they are highlighted teal with a leading (+) sign. This indicates there is more than one Workflow Response associated with that event. You can preview all the responses on the right sidebar under Workflow Responses. To view or edit Workflow Responses as needed, you can drill down into the window by clicking on the field. 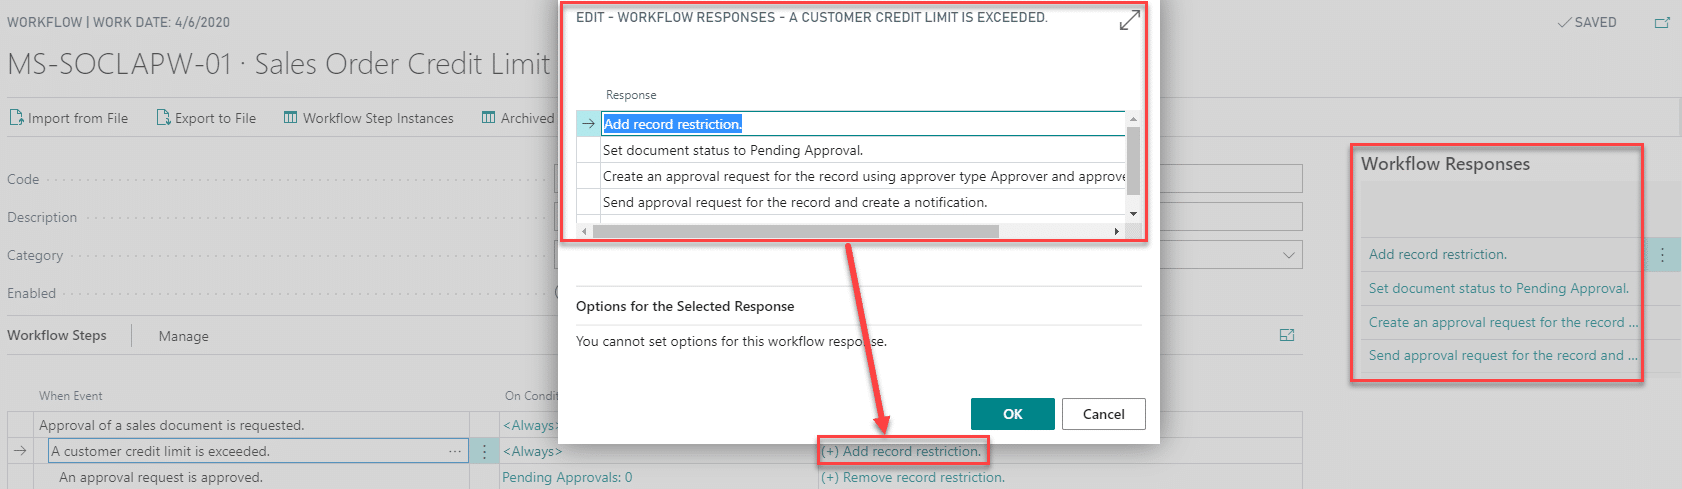 Within this window, you can also add or remove responses. To add a response, click on the horizontal ellipsis on the right, which will provide a list of Workflow Response options. In the below example, we decide to add an automated message if an approval is required after the sales order is released so the user is notified as to why the order has been sent for approval.  Depending on the Workflow Response, there may be additional fields you must complete for the selected response. These Options for the Selected Response will vary with each Workflow Response from no information required to several fields needing to be completed. For our example, the Options for the Selected Response section is where we will type the message we want the system to generate when the workflow is triggered. 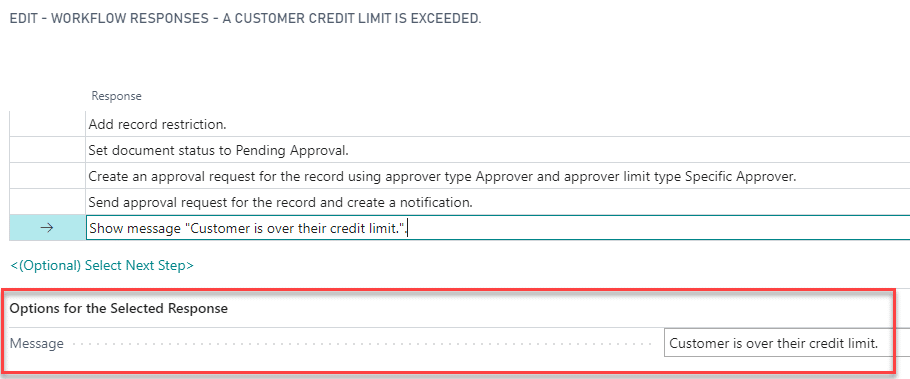 Workflows can be daunting to set up at first; but once you understand the structure of the Workflow Steps and the logic taking place, they can be a powerful tool to optimize approval processes for some of your key business processes. Please follow for our next installment where we will go over customizing the preconfigured workflow template to meet some of our specific needs. Источник: https://stoneridgesoftware.com/imple...central-part-2
__________________
Расскажите о новых и интересных блогах по Microsoft Dynamics, напишите личное сообщение администратору. |
|
|
|
|
|


 Линейный вид

