 08.09.2017, 11:11
|
#1 |
|
Участник
|
gideonvos: API to CDM using Flow in a PowerApp
Источник: https://gideonvos.wordpress.com/2017...in-a-powerapp/
============== There have been some interesting developments since late last year around Microsoft Dynamics with the addition of Flow, PowerApps and the Common Data Model. It has been hard for ISV’s to keep up to date, considering we’ve gone from “AX 7” to Microsoft Dynamics 365 for Operations and in the future the introduction of the Common Data Model, bound to shake things up even more, all in the space of less than twelve months. As an ISV with a payroll module that has been tightly embedded into AX since 2009 we’ve not been immune to these changes and considerable thought and preparation has gone into future-proofing our product. As our payroll engine have always been .NET based, this has allowed us some flexibility in terms of portability. Dynamics, or AX, has always been just a UI for us, something that facilitates interaction between the user and our payroll engine, while utilizing the storage of AX in the same vein. This all changed over December last year when we decoupled our engine from AX and moved it to Azure as a proper App Service with an API, moving storage from AX to Azure Table Storage at the same time, delivering flexibility, scalability and a fourfold performance increase over our standard “fully embedded” AX version. In the future, Dynamics properly becomes no more than a UI for us, and our interaction with Dynamics will be via the Common Data Model to retrieve and store key data elements (mostly HCM fields) as we need it during processing. To that end, it is important to ensure our API-based product is architected well enough to take advantage of, and provide services via PowerApps, Power BI and is able to be used in Microsoft Flow. The steps below is very much exploratory, as this is my first experience in building a PowerApp and using Flow, so don’t expect miracles in this post. So the aim here is to utilize our payroll engine via its API hosted in Azure to fetch the results of a pay run, and then populate that into a custom entity in CDM, potentially then being used in Dynamics in the future. First things first, let’s get the call to the API worked out. We’ll start with a basic Flow which calls the API via HTTP, retrieves the pay run results, parses the resulting JSON and then save that into a CSV somewhere in OneDrive for Business. All of this is possible using Flow using the fairly simple (if somewhat buggy) web-based UI. The overall result is shown below and we’ll go into each step in more detail this post. 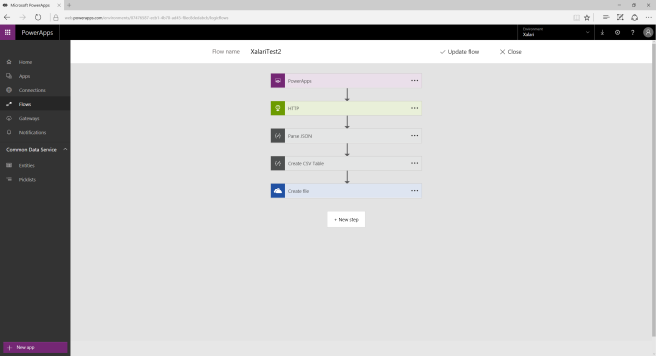 So here we have an HTTP service, posting its results to a JSON parser, which in turn transfers the results to a CSV generator, ultimately ending up as a file in the OneDrive for Business service right at the end. 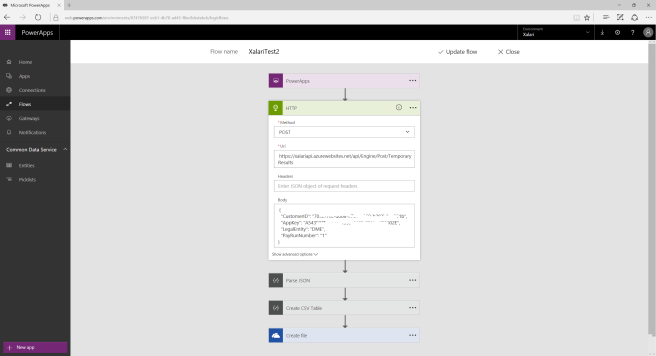 The HTTP service requires a number of parameters. First we are doing a POST call, and we’ll enter the URL and method for that call. No headers are required, but our API expects a number of parameters to be supplied via the body, which we’ll hardcode for now and paste as JSON. These include the CustomerID, APP Key, Legal Entity and Pay Run.  For the JSON parser we need to specify where the JSON is coming from, which is of course the body of the result from our HTTP call, so we will select that. Now things unfortunately get a lot more painful. We need to supply the JSON schema for the result being returned so that the JSON parser can parse it all properly. So if you are building an API, make sure you have all your specifications ready and sorted. At this point I’ll go back to the API drawing board and fiddle around to extract the schema by pasting an example result. Flow is smart enough to figure out the schema for us from that. Nice. To create a CSV file from that we simply select that output in the CSV service as shown. 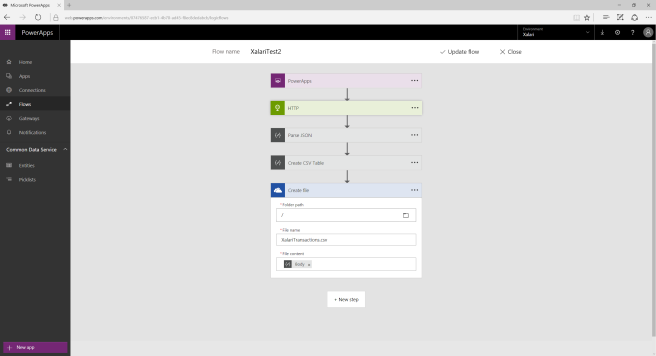 The rest is easy, just select the OneDrive for Business service as the next connection, sign-in to supply credentials and specific the folder, file name and the input, which is of course the CSV we created in the previous step. 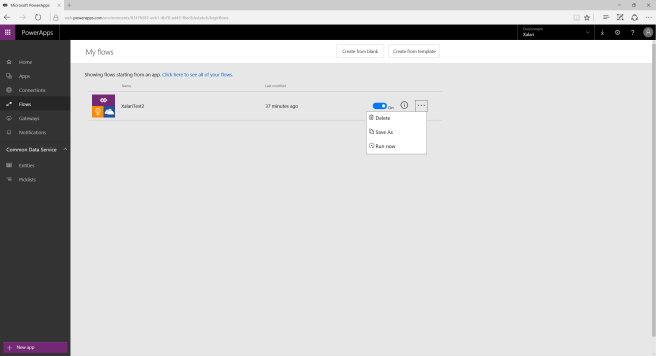 Let’s go ahead and save our changes, then run this Flow as shown. 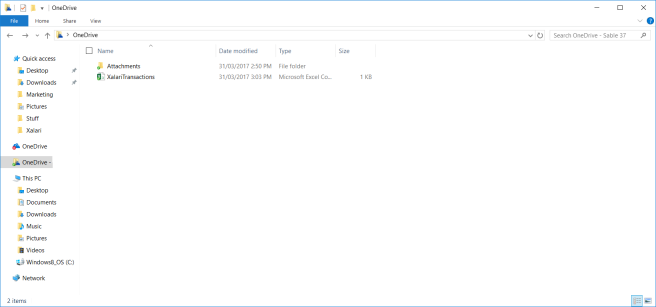 Our OneDrive for Business folder shows the file created, and we can open that in Excel to view the results which is spot-on. So that works. 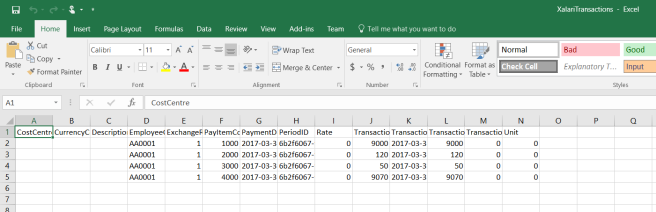 This is all fine, but we really need this data in a CDM entity not a CSV file. So let’s remove the CSV and OneDrive for Business services. Next, create a new custom entity in CDM as shown below. 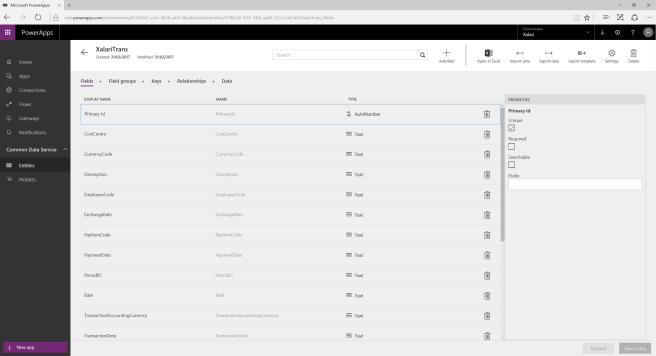 Unfortunately, we have to enter each field manually, there is no easy way to import a schema that I can see. It’s simple enough though, we can use the Excel we generated previously and just copy the headers in as field names. We’ll save this new entity as “XalariTrans” and return to fixing up our Flow. 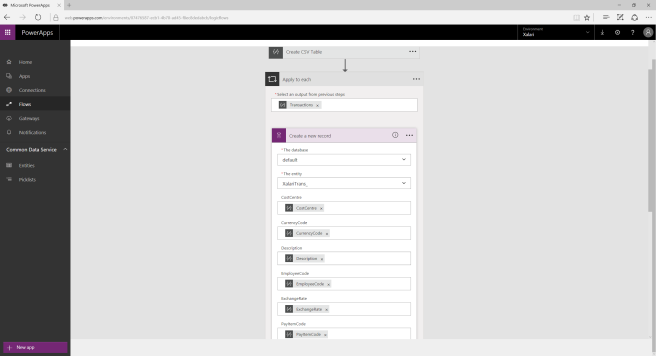 Drop in a Create Record Service as shown, and supply the database and entity. Each field in the entity needs to be mapped to an element extracted from the JSON in the previous step, and this is made easy with Flow. Let’s run this. Notice that Flow automatically added a loop around the Create Record service to ensure that all records are inserted automatically. 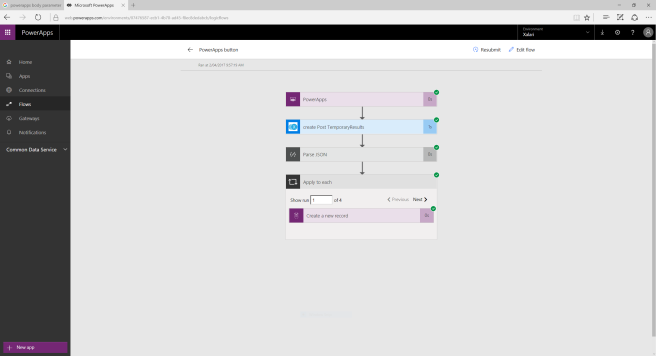 The run was successful and we can go back to our custom entity and verify that the data was transferred from the API to CDM as shown below. 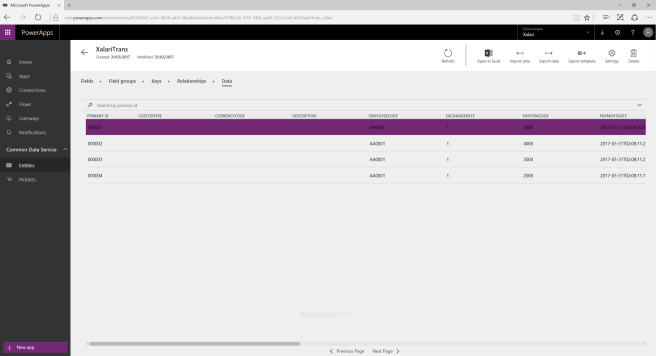 This approach while working, is rather lame. What we really want is to build a set of API calls that can be reused as connections, and for that we need to create a Custom Connection. So under Connections click Custom, and then click Add. We’ll enter a name, description and upload an icon. We also need to provide a Swagger file which is essentially an API specification that details the inputs, outputs, schema, URL, and much more. Creating a Swagger file from scratch is a study in frustration for first-timers. I ended up using several tools to generate and edit the proper Swagger JSON file and even then, had complaints when loading it into Flow. So, with the Swagger specification created and selected, we can add this new Connection Service. 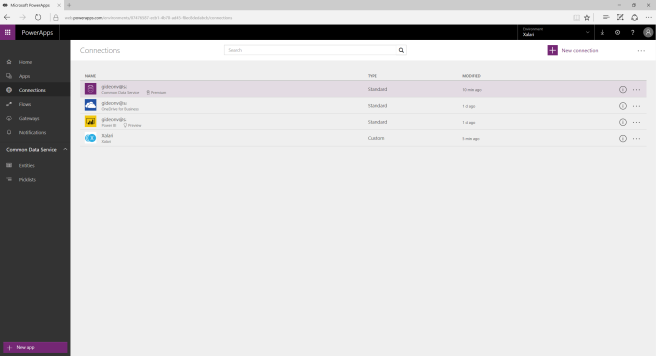 We can now update our Flow by removing the HTTP service and replacing that with our new Connection service as shown below.  This runs fine, however recall that our API calls require parameters in the body of the POST call, including Customer ID and App Key. For now we’ve pasted the body JSON into the Connection as a parameter but that is rather useless, as these are customer-specific. So we need to retrieve these as settings from our PowerApp somehow, pass that to Flow during execution, which in turn will stick that in the body of the POST call. The way to achieve this is to modify our Swagger file for our Custom Connection as shown below: 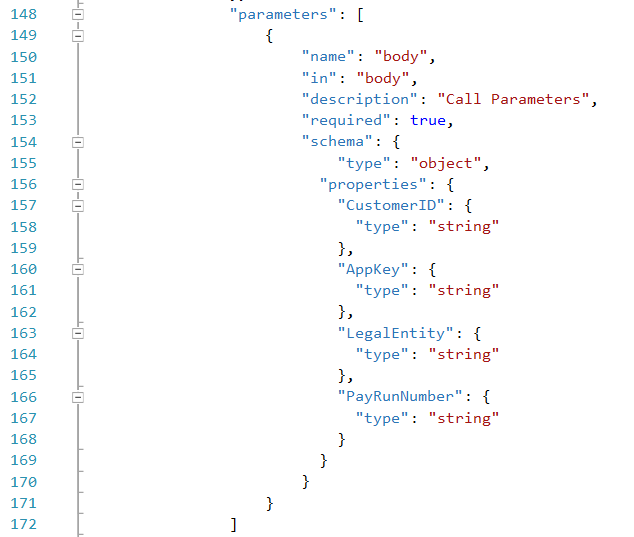 With that done we can update the Custom Connection. When we edit our Flow, notice how those parameters are now available in the Connection as shown below.  As these will come from our PowerApp, we can specify that for each required input parameter. Notice it is in purple, matching the PowerApp at the top to indicate that expectation. So it knows those values need to be provided by the PowerApp. Nice. So let’s use the PowerApp designer to build a PowerApp that will use our Flow. You’ll need to download the desktop version if you want to call a Flow from within your PowerApp, which is not supported in the online version. We’ll build a simple app by dropping two text boxes on the form with a single button we rename to “Transfer”. We’ll set the text for the boxes to “DME” and “1” to correspond to the LegalEntity and PayRun parameters we require. This can of course be left blank and edited by end users. 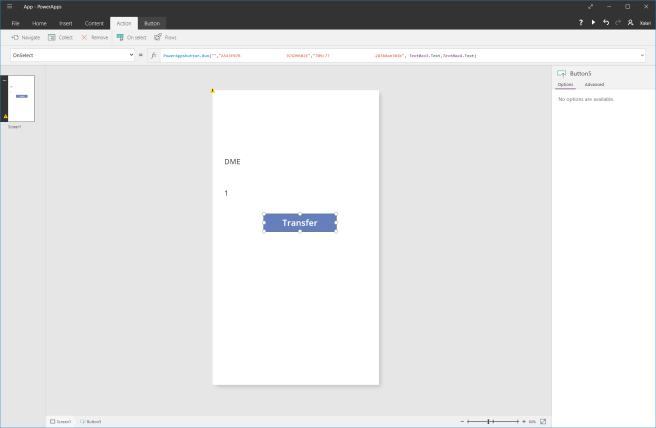 Select our Flow under the Actions tab. This links the Flow with our button’s OnSelect event, the result being when the button is clicked, the Flow will be called. Notice at the top we are passing our parameters to the Flow, being the Customer ID, APP Key, and the contents of the two text boxes, allowing users to change the Legal Entity and Pay Run by editing the values in the text boxes. 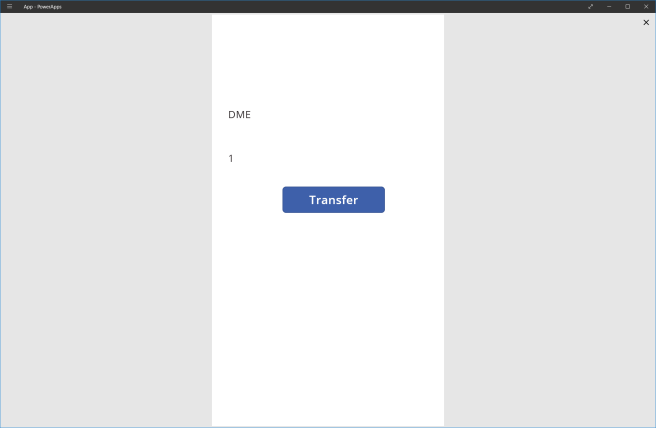 That’s it, we can run the PowerApp and hit the Transfer button. After a second or two we can return to our Entity in CDM and view the Data tab, showing that the records was transferred successfully. A simple exercise indeed, we are still miles from having a professional PowerApp but we’ve managed to figure out a number of things including API calls, using Swagger, building Custom Connections and Flow’s, and passing parameters from a PowerApp to Flow, then to a backend API and storing the results as records in CDM.   Источник: https://gideonvos.wordpress.com/2017...in-a-powerapp/
__________________
Расскажите о новых и интересных блогах по Microsoft Dynamics, напишите личное сообщение администратору. |
|
|
|
|
|


 Линейный вид

