 10.04.2017, 22:12
|
#1 |
|
Участник
|
atinkerersnotebook: Creating a Customer Inquiry Phone PowerApp for Dynamics 365
Источник: https://atinkerersnotebook.com/2017/...-dynamics-365/
============== PowerApps is definitely one of the coolest tools that we have in our back pockets for extending out Dynamics 365, because it allows non developers to quickly and easily create new apps for Dynamics 365 without doing a lot of coding. It’s almost so easy you will feel like you are cheating. In this walkthrough we will show you how easy this is by creating a sample application that will allow you to browse customers, orders and order lines directly from a phone, and we can probably do this in about 5 minutes. Topics Covered
The first thing that we need to do is create a new PowerApp using the PowerApp designer. How to do it… Start off by opening up the PowerApp desktop app and then click on the New menu item on the left.  This will open up the Create an app form where you can create apps directly from some of the common services. But in this example we will want to create a Blank app. We have two different options here, we can create a Phone layout or a Tablet layout. We will click in on the Phone layout option. 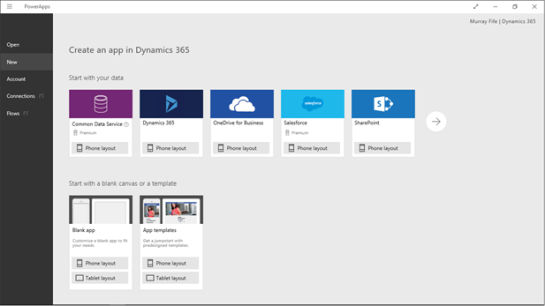 This will open up the PowerApp designer page. On the left you will see the one page that is automatically created. In the center is the canvas for the design. On the right is our configuration panel. And along the top is the Action/Ribbon bar.  Connecting the PowerApp to your Dynamics 365 data Now that we have an app to work with we will want to connect it to our data within Dynamics 365. How to do it… To do this, switch to the Content action menu and then click on the Data sources button.  On the right hand panel a Data sources option will show up. To connect to the data, click on the Add data source button.  This will then show us a list of different data sources that we can connect to. In this example we will want to click on the Dynamics 365 for Operations connection icon.  This will open up a list of connections to our Dynamics 365 for Operations environments that we can use for the application. All we need to do here is click on the connection. 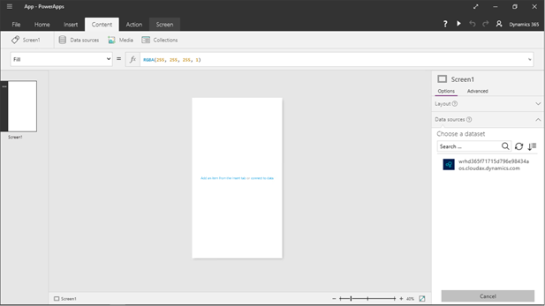 Now PowerApps will interrogate the Dynamics 365 connection for all of the entities that are published for us to use.  For this example, we will type in customers into the filter box.  This will allow us to see the Customers entity and we can check the box to include it in the connection.  Before we finish though, let’s add in a few more table connections. Filter out the list by typing in salesorder into the filter box.  This will allow you to select the SalesOrderHeaders and SalesOrderLines entities that you can select and then click on the Connect button.  After you have done that you will see that the three data entities are now connected to the PowerApp.  Creating a Customer browser form Now that we have connected the PowerApp to our data within Dynamics 365 for Operations, let’s start creating a form, and a great place to start is to create a way to browse through the customer data. How to do it… To do this we will want to add a control to the form that we can use to view all of the data that we have in the Customers data source. To do this, switch to the Insert action bar and we will see that there are a number of different visual control that we can use.  The form that we want to use here is the Gallery control which gives us a way you browse through multiple records at once. If you click on the Gallery button then you will see that here are a number of different formats for the gallery as well. We will want to select the Vertical Text gallery option. 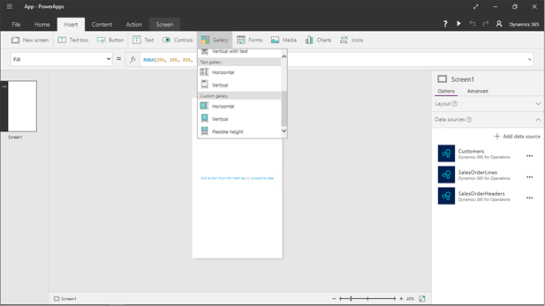 This will add a new control to the page that we created. 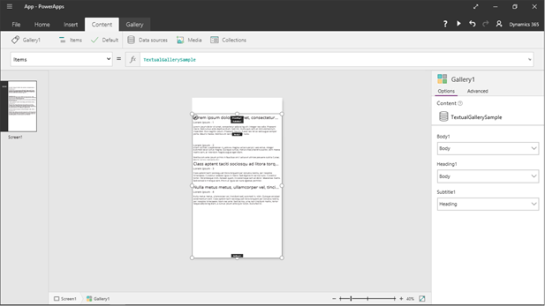 It is connected to dummy data right now, but if we click on the Connection icon on the right hand side and it will show us all of the connections that we added to the app earlier on. Start off by selecting the Customers connection.  This will change the default fields that are connected to the form. 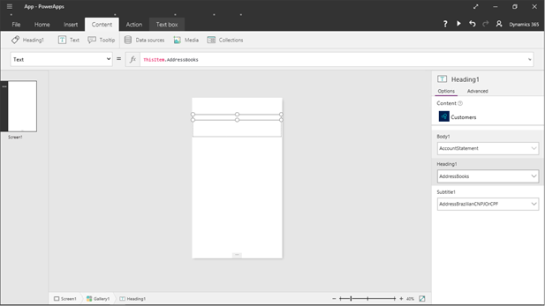 If you click on any of the fields on the right hand panel, you will be able to browse through all of the fields that are available within the connection. In this step we clicked on the Heading1 field and can select the Name field from the Customer connection. 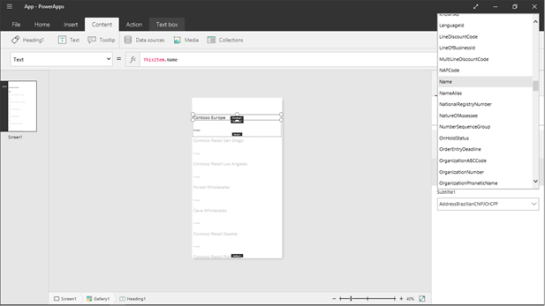 If we click on the Subtitle field we can link that with the CustomerAccount field. 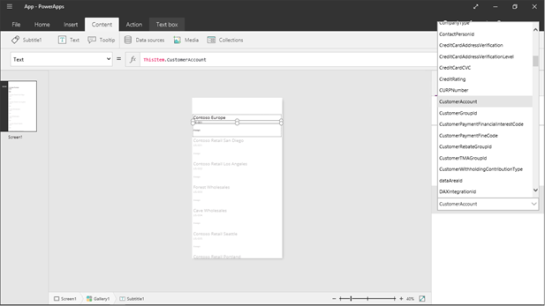 Now select the Body1 field. If you look up in the formula bar, you will notice that there is a formula that links to the fields. 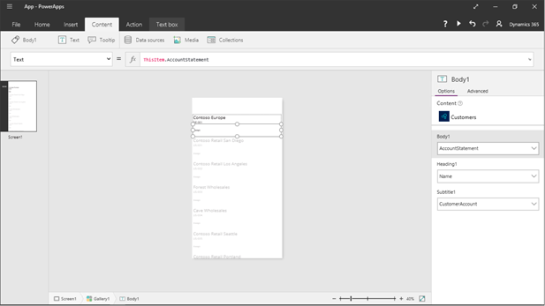 If we want, we can create a function that includes multiple fields. In the formula bar, type in this function to show the Street and City. ThisItem.AddressStreet & “, ” & ThisItem.AddressCity If we want to see the form in action, all you need to do is click on the Play button in the form header. 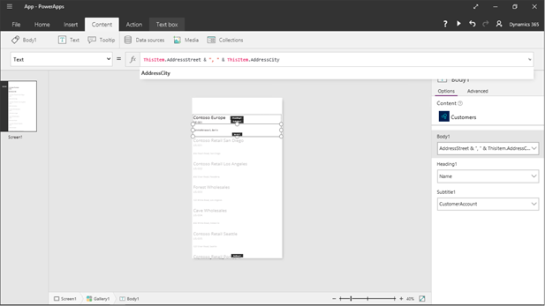 Adding a Sub Form Now that we have a Customer browser, we will probably want to add a little bit or other functionality. Since we connected the Sales Order Header entity to the data connection, then let’s add a sub form that will show all of the sales order headers. How to do it… To do this, we will want to create a new screen by clicking on the New Screen button within the Home action bar.  This will create a new blank screen for us. On the right hand side we will see a few sample layouts that we can use to save us some time in adding data galleries.  We can select a simple gallery browser layout and that will automatically add in a few sample controls.  If we click on any of the fields within the form then we will be able to see the fields and also the data connection.  Here we will want to click on the template data connection and change it to the SalesOrderLines data connection.  Now we will be able to click on the Heading2 field dropdown list and then select the SalesOrderNumber field. Now we see all of the sales orders are listed in the form.  Filtering the sub form Detail Seeing all of the sales orders is great, but, we only want to see the orders for the customer that we selected in the previous screen. So we will want to filter out the results just to the ones that are associated with the customer. How to do it… To do this click on the Function dropdown list on the left, and select the Items function. Within the function detail we can see that this is linked to the SalesOrderHeaders connection.  To do this, change the filter function to this: Filter(SalesOrderHeaders, OrderingCustomerAccountNumber = Gallery1.Selected.CustomerAccount) This command filters the SalesOrderHeaders table, just to show the sales orders where the OrderingCustomerAccountNumber matches the CustomerAccount that is selected form the first screen.  Creating a drill through action from the parent to the child form Now that we have the sub form, we need to do one last thing before we can see all of this working. And that is to create a link from the parent form so that when we click on the record, it takes us to the child form. How to do it… To do this, select the field that we want to trigger the drill through on and then select the OnSelect option from the function bar.  Now we just need to change the function to use the Navigate command. So update the function to: Navigate(Screen2,ScreenTransition.Cover) This just says to navigate to the second screen that we created.  The next thing you know you will be taken into the sub form, and only see the sales orders associated with the customer account.  Adding additional drill through forms Since we also included the Sales Order Lines connection into the application, let’s finish off the application by adding a third form that we can drill through into from the Sales Order Headers form to see all of the products on the order. How to do it… To do this, just click on the New Screen button to create a new screen and then select the form layout that you want to use for the form. In this example we got a little fancy and used the tiled view.  Then click on the connection link and point it to the SalesOrderLines connection.  Then set the Body2 field to link to the ItemNumber field.  And then change the Footer1 field to show the SalesPrice field.  Then update the Items function to filter out the data that shows to just the lines that are associated with the Sales Order Header form. You can do this by using this function: Filter(SalesOrderLines,SalesOrderNumber = BrowseGallery1.Selected.SalesOrderNumber)  Then return to the second screen and change the OnSelect function to navigate to the third form by using the following function: Navigate(Screen3,ScreenTransition.Cover) 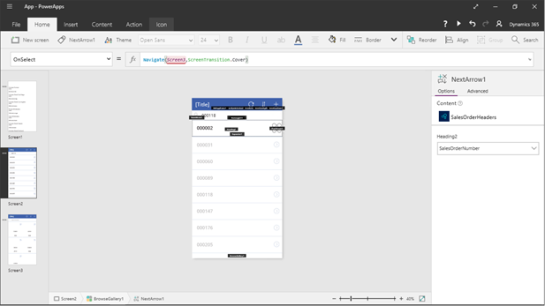 BAM! Now we are seeing the lines as tiles.  Summary How easy is that. We just created a simple app that browses customers and allows us to see all of the sales orders and lines for the customer as well. Coding this the normal way would take forever, and for this example we created it in just a couple of minutes. All we need to do now is pretty it up a little and add some branding, but that is the fun part. About the Author Murray is a Technical Solution Professional at Microsoft and Author of over 25 books on Microsoft Dynamics including the Bare Bones Configuration Guide Series which contains over 15 books that show novice users host to set up Microsoft Dynamics using visual walkthroughs. These guides start off with the Financial modules of Microsoft Dynamics and then progress through the Operational, Distribution, and then the more specialized modules like production, service management, and project accounting. You can find all of his books here on Amazon http://www.amazon.com/author/murrayfife. Throughout his 30+ years of experience in the software industry he has worked in many different roles, including as a developer, an implementation consultant, a trainer and a demo guy within the partner channel which gives me a great understanding of the requirements from both customers and partners perspective. Here is all of his contact information: Email: murray@murrayfife.com Twitter: @murrayfife Facebook: facebook.com/murraycfife Google: google.com/+murrayfife LinkedIn: linkedin.com/in/murrayfife Blog: atinkerersnotebook.com Docs: docs.com/atinkerersnotebook Amazon: amazon.com/author/murrayfife   Источник: https://atinkerersnotebook.com/2017/...-dynamics-365/
__________________
Расскажите о новых и интересных блогах по Microsoft Dynamics, напишите личное сообщение администратору. |
|
|
|
|
|


 Линейный вид

