Источник:
https://www.powerobjects.com/2019/01...ct-xrmtoolbox/
==============

At times, you will find it useful to know which Dynamics 365 Processes (Workflows, Actions, Business Rules) currently reference a specified Subject(s) in the Subject Tree. This is especially true if you intend to rename the Subject(s) and want to keep the Process references accurate and up to date. There is a way to do this using the FetchXML Builder Plugin in the XrmToolBox utility. In today’s blog, we’ll walk you through how to do it.
Assumptions
To illustrate how it’s done, we’ll walk through an example that is based on three important assumptions:
1. You have the XrmToolBox tool with the FetchXML Builder Plugin already installed on your computer and have created a connection within XrmToolBox to your Microsoft Dynamics 365 Org. For information/documentation on downloading and installing XrmToolBox, connecting it to your Microsoft Dynamics 365 deployment, and adding XrmToolBox plugins, go to
Download XrmToolBox.
2. The Subject Tree (navigate to
Settings > Business Management > Subjects) is defined as shown below:

3. The example Subjects are referenced in these Processes (Entity = Case) that have been defined and created in a D365 Org with conditions as follows:
- Test Action Referencing Test Subject Tree (references the Parent Subject and both of its Children Subjects)

- Test Workflow Referencing Test Subject Children
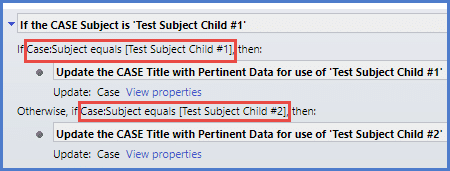
- Test Workflow Referencing Test Subject Parent

- Test Workflow Referencing Test Subject Parent and Test Subject Child #1

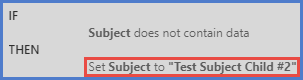
- Test Business Rule Referencing Test Subject Child #2
Now you want to identify all Processes that reference the highlighted Subjects from the Subject Tree.
Steps
Assuming a Subject Tree and Processes as shown above for this example, follow the steps below to determine which Processes reference “Test Subject Parent” and which reference each of its two Child Subjects:
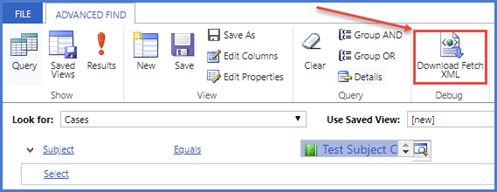
1. First, in your D365 Org, open the Advanced Find tool.

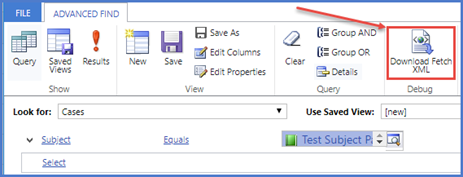
2. Create an Advanced Find query (look for
Cases entity) where the Subject field is equal to
Test Subject Parent and click the
Download Fetch XML icon to generate a FetchXML file of type ‘XML Document’ in your Downloads folder.
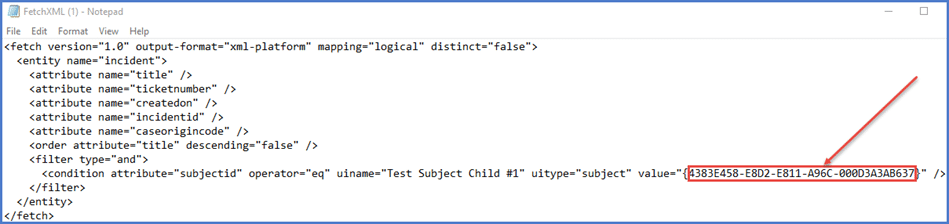
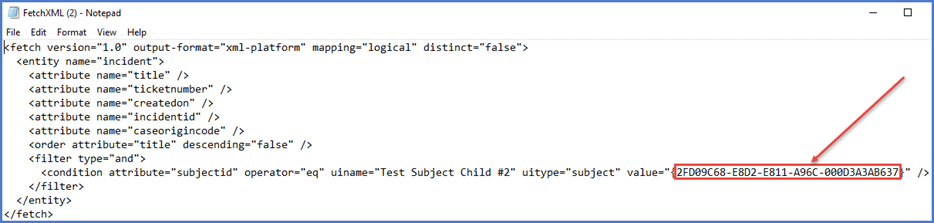
3. Find and open the downloaded FetchXML file with Notepad or another preferred Text Editor tool. In this file, take note of the
Test Subject Parent‘s globally unique identifier (GUID) that is embedded in the FetchXML. Be ready to copy the GUID from this file for a later step.

4. Repeat Steps 2 and 3 for
Test Subject Child #1 and
Test Subject Child #2.
Test Subject Child #1

Test Subject Child #2
5. Now open the XrmToolBox utility and
Connect to your D365 Org.


6. Open the FetchXML Builder Plugin by clicking on
Plugins, then on the
FetchXML Builder icon, and then on the
Continue button.


7. Once FetchXML Builder is open, in the top left
Query Builder pane, right click on the
fetch top:50 query statement. In the bottom left
Quick Actions pane, you can change the value for
Top to indicate the maximum number of rows you want returned from the fetch, but 50 will work for our purposes, as the number of Processes we are trying to find is far less than 50.


8. Next, in the
Query Builder, click on
entity. In
Quick Actions, select
workflow in the
Entity name dropdown.


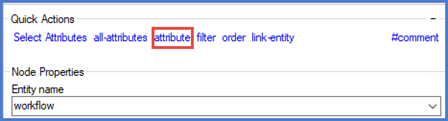
9. In
Query Builder click on
entity workflow. In
Quick Actions click on
attribute.

10. Now go back to
Query Builder and click
attribute. In
Quick Actions select
name in the
Attribute name dropdown.


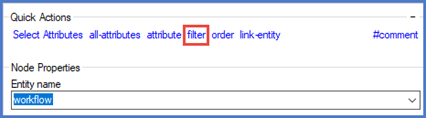
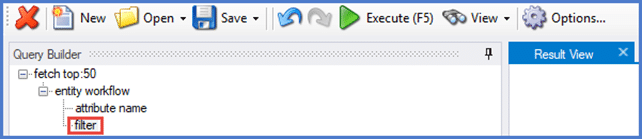
11. Click again on
entity workflow in
Query Builder. In
Quick Actions click on
filter.

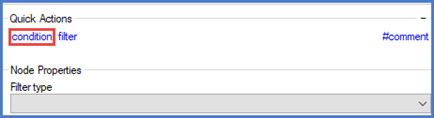
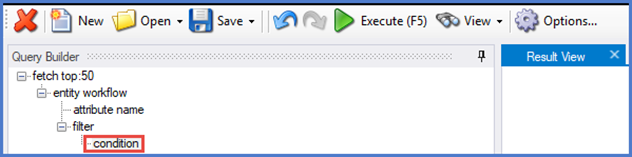
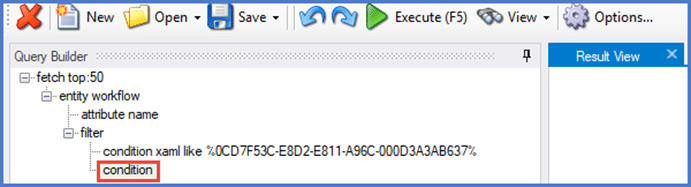
12. With
filter still selected in
Query Builder, click on
condition in
Quick Actions.
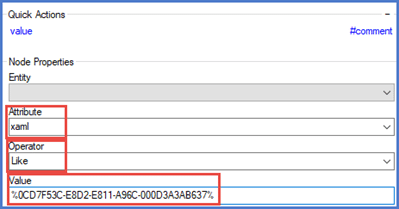
13. With
condition still selected in
Query Builder, return to the
Quick Actions pane and select
xaml in the
Attribute dropdown and
Like in the
Operator dropdown. Now copy the GUID in the FetchXML file for
Test Subject Parent (noted in Step 3)
. Place it into the
Value field between two “
%” characters.
14. Select
filter once again in the
Query Builder query structure and again click on
condition in
Quick Actions (this is done just as shown in Step 12)
.
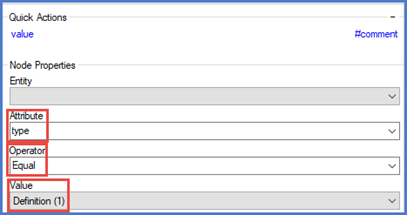
15. With a second
condition now placed into and still selected in the
Query Builder structure, go to the
Quick Actions pane and select
type in the
Attribute dropdown,
Equal in the
Operator dropdown, and
Definition (1) in the
Value dropdown.
16. The query is now ready to run! You can use the
Save button to save this query for future use – the
Open button will allow you to browse to it and open it again when you reenter FetchXML Builder at a later time. At this time click the
Execute button or
F5 key to run the query and see results in the Result View pane to the right of
Query Builder. Per our Process definition (assumption #3 above), the three Processes listed (one Action, two Workflows) all referenced the
Test Subject Parent Subject.

17. To also identify Processes with references to other Subjects (e.g.,
Test Subject Child #1 or
Test Subject Child #2) you can build queries for each Subject by clicking
New to start a new query, repeating Steps 7 – 16, and taking care to use the correct GUID (e.g., as noted in Step 4) for the Subject reference you want to find. However, at this point you can now just use this same query that has already been constructed, and, for each of the two Subjects, simply replace the
Test Subject Parent GUID with the GUID for the Subject you want to find. Then
Execute each of the new queries. Here are the results when querying the other two Subjects:
Test Subject Child #1 (referenced in one Action and two Workflows)
 Test Subject Child #2
 (referenced in one Business Rule, one Action, and one Workflow)

Note that you can easily repeat these steps for any Subject for which you want to find the Processes that contain a reference to it.
That’s it for today, readers. For more information on Dynamics 365 and other useful tips, feel free to contact us! Also, make sure you check out our
blog weekly for the latest news and
educational materials. Happy D365’ing!
Источник:
https://www.powerobjects.com/2019/01...ct-xrmtoolbox/